Garage golf simulator: how to plan a bay around the door, the car and the cold
How to fit a golf simulator in a garage: the door track, one bay or two, which way to hit, heat, light, dust, and what a budget or full build costs.
Key takeaways
- A single garage bay, about 10 to 12 ft wide and 20 to 24 ft deep, fits any launch monitor. A Garmin R10, net and mat build costs roughly $800–$1,400.
- The door track and opener set your real ceiling. A 9 ft garage with the track at 8 ft 3 in has 8 ft 3 in of headroom for the first 8 ft.
- A full bay with an impact screen, short-throw projector and gaming PC runs roughly $3,000–$14,000, before software, heating and lighting.
- If the car still has to park, hang a screen on a ceiling roller instead of a fixed enclosure. A fixed enclosure needs its own bay in a double garage.
On this page
A garage is often the best simulator room in the house. A single bay runs about 10 to 12 ft wide and 20 to 24 ft deep. That’s more depth than any launch monitor (the gadget that measures your shot) asks for. And a concrete floor doesn’t care what you drop on it.
The problems are over your head and outside. The door track and opener hang into your swing. And from November to March, the room is a fridge.
This guide takes the garage decisions in the order you’ll hit them, from the door track to whether the car still gets to park. At the end are two builds with price ranges: a net with a radar unit, and a full screen. The general rules on ceiling, depth and width are on the space page. The room checker will test your garage’s numbers before you buy anything.
The door track and the opener
Stand in the bay with the door closed and look up. The drywall is probably 8 to 10 ft up. The door track runs back from the top of the door opening for about the height of the door, 7 to 8 ft. It hangs 6 to 12 in below the ceiling. The opener motor sits further back on its own rail, often lower than the track. With the door open, the door panels lie along the track and take a few more inches.
All of that is your real ceiling for anything you swing under it. A 9 ft garage with the track at 8 ft 3 in is an 8 ft 3 in garage for the first 8 ft from the door.
There are three ways to handle it, cheapest first:
- Hit from past the end of the track. A 22 ft bay makes this easy, and the plan is on the room sizes page.
- Close the door before you play. The panels stand up out of the way, so only the track and motor are left.
- Raise everything. If you want the whole bay, have a door company switch to a high-lift track with a wall-mounted jackshaft opener. That moves everything up against the ceiling. It’s the one upgrade that turns an 8 ft garage into a 9 ft one.
Single bay or double
A single bay gives you depth but takes away width. Ten to 12 ft is enough for a net or a 10 ft screen. But the enclosure (the frame and side panels around the screen) will sit a foot or less from each wall. A lefty will have to hit from the same side as a righty. And the car can’t come back in while the frame is up.
A double garage gives you a choice. You can use one bay for the simulator and keep parking in the other, with a strip of net between them to catch the shank. Or you can take the whole 20 to 24 ft width for the dedicated-room plan: a 12 ft screen, side netting and a chair. If there’s a center post, it usually lands right where you want the enclosure’s edge. So measure from the post, not the wall.
A tandem garage, with one bay deep enough for two cars, is the best of all. The car stays at the door end, the simulator goes at the back, and your swing is nowhere near the track.
Hitting along the bay or across it
Hitting along the bay, from the door end toward the back wall, is the default. The back wall never moves, so the screen hangs on it. A single bay’s depth gives a radar all the room it wants behind the ball. And your swing happens 12 ft or more from the door, usually clear of the track.
Hitting across the bay only works in a double garage. Its one real plus: the 20 to 24 ft width becomes your depth, and your swing sits under the clear ceiling between the two tracks. The downsides? The screen hangs on a side wall that may hold the water heater or the electrical panel. And the whole garage becomes the simulator. If the car has to park, hit along a single bay.
The cold
Launch monitors are electronics. Their spec sheets usually list an operating temperature range that stops above freezing. Check your unit’s figure before a January session. In the cold, batteries lose charge and screens get sluggish. A camera unit’s lens will also fog up when you bring it in from a cold shelf to a warm room.
Heat the golfer, not the garage. An infrared radiant heater, mounted high and aimed at the hitting area, warms you and the mat. It doesn’t waste effort on air that leaks out under the door. Keep any heater well away from the screen and net, which are polyester, and keep unvented fuel heaters outside. If you play a lot, a mini-split on the shared wall is the serious answer, and it cools the room in summer too.
The mat shows the cold first. A thin, rubber-backed mat stiffens near freezing, curls at the edges and slides on the concrete. A heavier mat with a thick foam or rubber base stays flat. So does a mat laid on plywood or on interlocking foam tiles. If you roll turf out around the mat, store it flat. A roll left in a cold garage keeps its curl for days. Our hitting mat list notes which mats sit flat on concrete.
Light for a camera unit
Radar units don’t care about light. Camera units do. The Square Golf, SkyTrak+ and Launch Pro all read the ball with cameras and a flash. They want steady, even light on the ball and no direct sun on the lens. In a garage, that means two things.
The door. A camera unit facing an open door on a bright afternoon is staring into the sun, and the makers warn against it. Close the door, or set things up so the unit faces away from it.
The lights. One bulb in the middle of the ceiling leaves the hitting area in your own shadow. Two LED shop lights, one on each side of the mat, give the camera what it needs. Don’t point either one at the launch monitor. Some cheap LED lights flicker too fast for your eye to see, but a high-speed camera sees it. If the unit starts missing shots under new lights, suspect them first.
Dust
Garages are dusty, and dust is hard on gear. Keep the launch monitor in its case between sessions. Wipe a camera unit’s lens with the cloth that came with it and nothing else. Blow the dust out of the PC every couple of months.
Sweep the mat before you play, because grit under the ball changes the strike and wears out the fibers. An enclosure with side walls keeps most dust off the screen. A screen hanging open to the bay needs a vacuum on the brush setting every few weeks.
A screen that rolls up so the car still parks
If the bay has to go back to being a bay, build around a roll-up screen instead of a frame. The screen hangs from a roller bolted to the ceiling joists at the back of the bay. It can be manual or motorized, and it rolls up out of the way when you’re done. Behind it, a sheet of foam or a second layer of net on the wall catches the odd ball that gets through. The mat leans against the wall, the launch monitor lives on a shelf, and the projector stays on its mount.
There are trade-offs. There’s no side netting, so a pulled shot hits the wall or the car. The screen moves more on impact than a tight one does, so the picture jumps and it’s louder. And the roller has to sit at least 1 ft off the wall so the screen has room to give. Against all that, you keep your garage.
A budget garage build
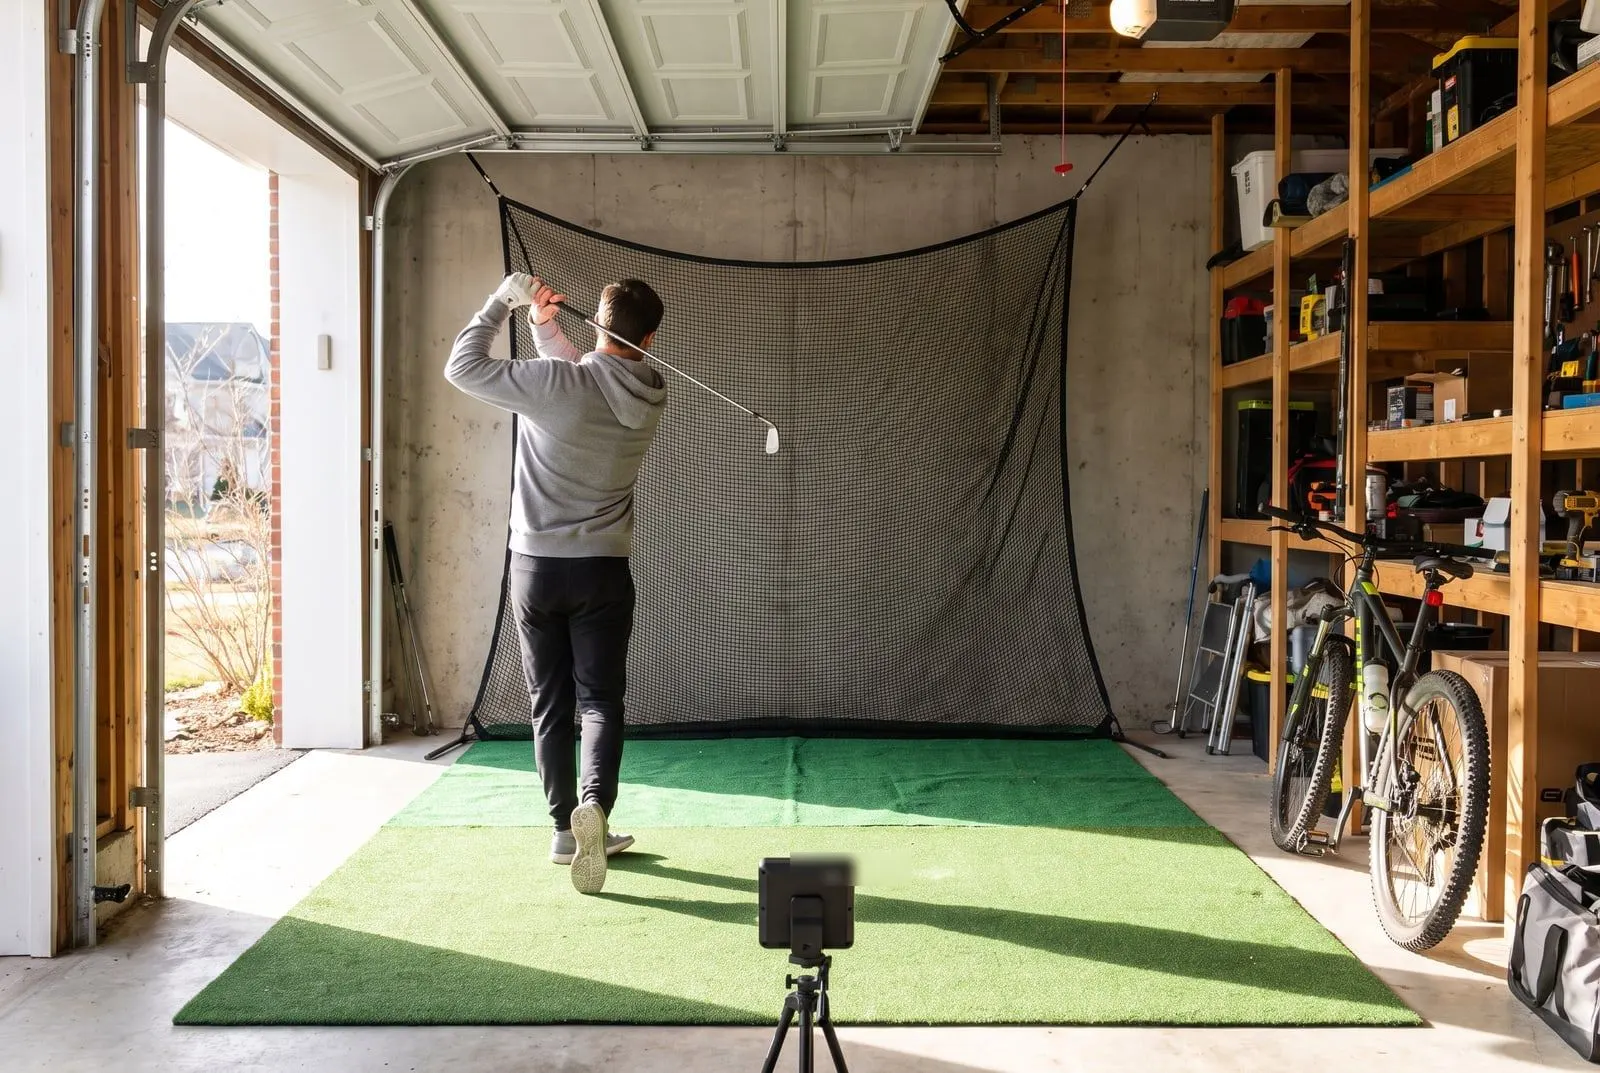
This is the build in the photo at the top: a radar unit, a net, a mat and the phone or tablet you already own. It plays simulator golf, with the picture on a tablet or on a TV on the side wall. The launch monitor price is a US retail range. The net and mat prices are rough.
A budget garage build
Garmin Approach R10
$500 to $600
Hitting net
$150 to $400
Hitting mat
$150 to $400
Display
$0 a phone, tablet or TV you own
All in$800 to $1,400
A few notes on the parts:
- The R10 needs about 7 ft behind the ball and 8 ft of ball flight. A single bay has both.
- The net should be wider than you think. Seven feet is the minimum, and 10 ft is better.
- The mat needs a thick base, which matters even more on concrete and in the cold.
- Software costs extra. Simulator play in the Garmin app needs its membership, and GSPro and E6 Connect cost more again.
The Garmin R10 review covers what it measures and where it falls short. The budget simulator list ranks this build against the MLM2PRO and Square Golf versions of it. Is the bay shorter than 15 ft once the car and shelves are counted? Then swap the R10 for the Square Golf and keep everything else.
A committed garage build
This is the full setup: an impact screen (the tough fabric screen you hit into), a projector and a PC. The launch monitor range starts with the Square Golf or MLM2PRO. The SkyTrak+ sits in the middle, and the Launch Pro is at the top. Here the room no longer limits your choice. Your budget does.
A committed garage build
Roughly $3,000 to $14,000 all in. Software and any heating or lighting come on top.
Launch monitor
$600 to $4,000
Impact screen with frame or enclosure
$600 to $3,000
Short-throw projector
$700 to $2,000
Gaming PC
$900 to $2,000
Hitting mat
$300 to $900
Turf around the mat
$0 to $2,000 optional
A few notes on the parts:
- The enclosure: a 10 ft wide one fits a single bay with a foot on each side.
- The projector: a short-throw projector makes a big picture from a few feet away. Mount it on the ceiling, 6 to 9 ft from the screen. Our projector list has the picks.
- The PC: GSPro needs a proper graphics card. The Garmin and Rapsodo apps don’t.
- The mat: it takes every shot, so buy one you’d happily stand on for an hour.
- The turf: a single bay takes about 200 sq ft.
Put your own picks into the cost builder to get a number for your bay instead of the whole range. Read the DIY build order before you buy the frame. The order matters in a garage, because the door and opener are much easier to work around before the enclosure goes up than after.
The first thing to do this weekend
You can answer the big question in an afternoon with a tape measure.
- Close the door and measure. Find the lowest point of the track and the opener.
- Mark the mat spot. Work out where the mat has to sit for your swing to clear them.
- Measure the depth from there. Is there 8 ft of ball flight to the back wall and 7 ft behind the ball for a radar? Then you’ve got a radar bay. Less than that, but at least 12 ft with a net or 13 with a screen? That’s a camera-unit bay.
- Run the numbers. Either one is a simulator. Put your numbers into the room checker and it’ll tell you which.
Questions people ask
Can you put a golf simulator in a single car garage?
Yes, as long as the ceiling clears your swing. A single bay is usually 10 to 12 ft wide and 20 to 24 ft deep. That's enough depth for any launch monitor and enough width for a 10 ft screen or a net. The usual problem is the door track and opener motor, so measure to their lowest point, not to the ceiling.
Does a golf simulator work in a cold garage?
Most launch monitors work down to a few degrees above freezing, but check your unit's spec sheet before a winter session. Colder than that, the electronics and batteries struggle, rubber mats stiffen and curl, and you won't want to swing anyway. A radiant heater aimed at the hitting area is the usual fix.
Can I still park the car in a garage golf simulator?
Yes, with a roll-up screen and a mat you can move. A screen on a ceiling roller rolls up above the car, the launch monitor goes on a shelf, and the mat leans against the wall. A fixed enclosure with a frame can't share a single bay with a car. It needs its own bay in a double garage.
Keep reading
- How much space do you need for a golf simulator?The ceiling, depth and width a home golf simulator needs, in feet and inches, with minimum and comfortable sizes and which launch monitors fit which rooms.GuideRead it
- Golf simulator dimensions: room sizes that work, with a plan for eachFour golf simulator room plans, from a 10 by 12 ft spare room to a 15 by 20 ft dedicated bay, with where the mat, launch monitor and projector go.GuideRead it
- DIY golf simulator: a build order that avoids the expensive mistakesHow to build your own golf simulator in the right order: measure, pick the launch monitor, then the frame, screen, mat, projector and PC, with what each costs.GuideRead it
- Garmin Approach R10 reviewWhat the Garmin R10 measures, where it falls short, how much room it needs, and who should buy it over the MLM2PRO or Square Golf.ReviewRead it
- The best budget golf simulators (under $1,000 to $3,000)What a cheap golf simulator really gets you at $800, $1,500 and $3,000, the five units worth buying, and what marketplace bargains usually turn out to be.Best-of listRead it