DIY golf simulator: a build order that avoids the expensive mistakes
How to build your own golf simulator in the right order: measure, pick the launch monitor, then the frame, screen, mat, projector and PC, with what each costs.
Key takeaways
- A net build (a Garmin R10 or Square Golf, a net and a mat) costs roughly $800–$1,400. A screen build with a frame, projector and PC runs roughly $3,000–$8,000.
- Measure the room, then buy the launch monitor, then the frame. Radars need 15 ft of depth with a net or 16 with a screen. Camera units work in 12 and 13 ft.
- Set the screen frame at least 12 in off the back wall (18 in is better), and put the ball 8 to 10 ft from the screen.
- Don't improvise the screen. A bed sheet gives a dim picture, rips and is loud, so hit into a net until a woven impact screen fits the budget.
On this page
- The build order at a glance
- Measure and check the room
- Choose the launch monitor by the room
- Decide between a net and a screen
- Frame options
- Screen material
- Side and ceiling baffles
- Mat and turf
- Projector mount: ceiling or floor
- Computer and cabling
- Lighting
- What a DIY build costs
- Mistakes to avoid
- Start with the tape
Building your own golf simulator is mostly about doing things in the right order. The expensive mistakes come from getting it backward. People buy a radar before measuring the room, build a frame before picking the screen, or hang the projector before standing on the mat. Do it in order and every part goes in once.
This guide runs from the first measurement to the last cable. Frames, screens and projectors are described by type, so you can match them to whatever’s in stock. The space page has the ceiling, depth and width you need, and the room checker will confirm your room passes. Everything below assumes it did.
The build order at a glance
Here’s the whole job on one screen. Each step has its own section below.
Build it in this order
- Measure the room. Ceiling, depth and width, then a slow swing with your driver.
- Pick the launch monitor. The room picks radar or camera. Your budget picks the model.
- Choose a net or a screen. If money or space is tight, start with a net.
- Run the cable, then build the frame. Run the HDMI cable before the frame goes up. Set the frame at least 1 ft off the back wall.
- Hang the screen and the baffles. The baffles go up before your first swing, not after the first hole in the drywall.
- Lay the mat, then the turf. Put the ball 8 to 10 ft from the screen.
- Mount the projector. Check for your shadow before you drill.
- Set up the PC and the lights. Light on the ball, dark on the screen.
Measure and check the room
Write down three numbers:
- The ceiling at its lowest point over the swing. That’s the beam, the duct or the garage door track, not the drywall.
- The depth, from the wall behind you to the wall the screen will hang on.
- The width where you’ll stand to hit.
Then do the slow swing check. Stand where the mat will go and swing your driver slowly at full length. Measure from the floor to where the clubhead peaks, and add 6 to 12 in of margin. If the ceiling doesn’t clear that, decide now: is this an irons room, or are you changing the ceiling? Nothing you buy later will fix it.
Choose the launch monitor by the room
A launch monitor is the gadget that measures your shot and tells the software where the ball would have gone. The room picks the type. Your budget picks the model.
A radar unit sits 7 to 8 ft behind the ball and tracks it as it flies, like a speed gun. It needs 15 ft of depth with a net, 16 with a screen. That makes the Garmin R10 and Rapsodo MLM2PRO garage and long-basement units.
A camera unit sits beside the ball and takes super-fast photos at impact. It works in 12 ft with a net, 13 with a screen. That makes the Square Golf, SkyTrak+ and Bushnell Launch Pro spare-room units.
Buy the launch monitor before the frame. Where it sits decides where the mat goes, and the mat decides where the frame goes. Our best launch monitors list shows the room each pick needs.
Decide between a net and a screen
A net build is a net, a mat, the launch monitor and a TV or tablet. A screen build adds a frame, an impact screen, a projector and a PC. It also needs more room. Plan on about 1 ft behind the screen, 12 ft of width for a 10 ft screen, and space overhead for a projector mount.
Nothing in the net build goes to waste if you add a screen later. The net turns into side netting, the mat stays, and the launch monitor doesn’t care what it’s hitting into. If your budget or your room is borderline, build the net version first.
Frame options
The frame holds the screen tight and keeps it off the wall. Here are four ways to build one, from cheapest up.
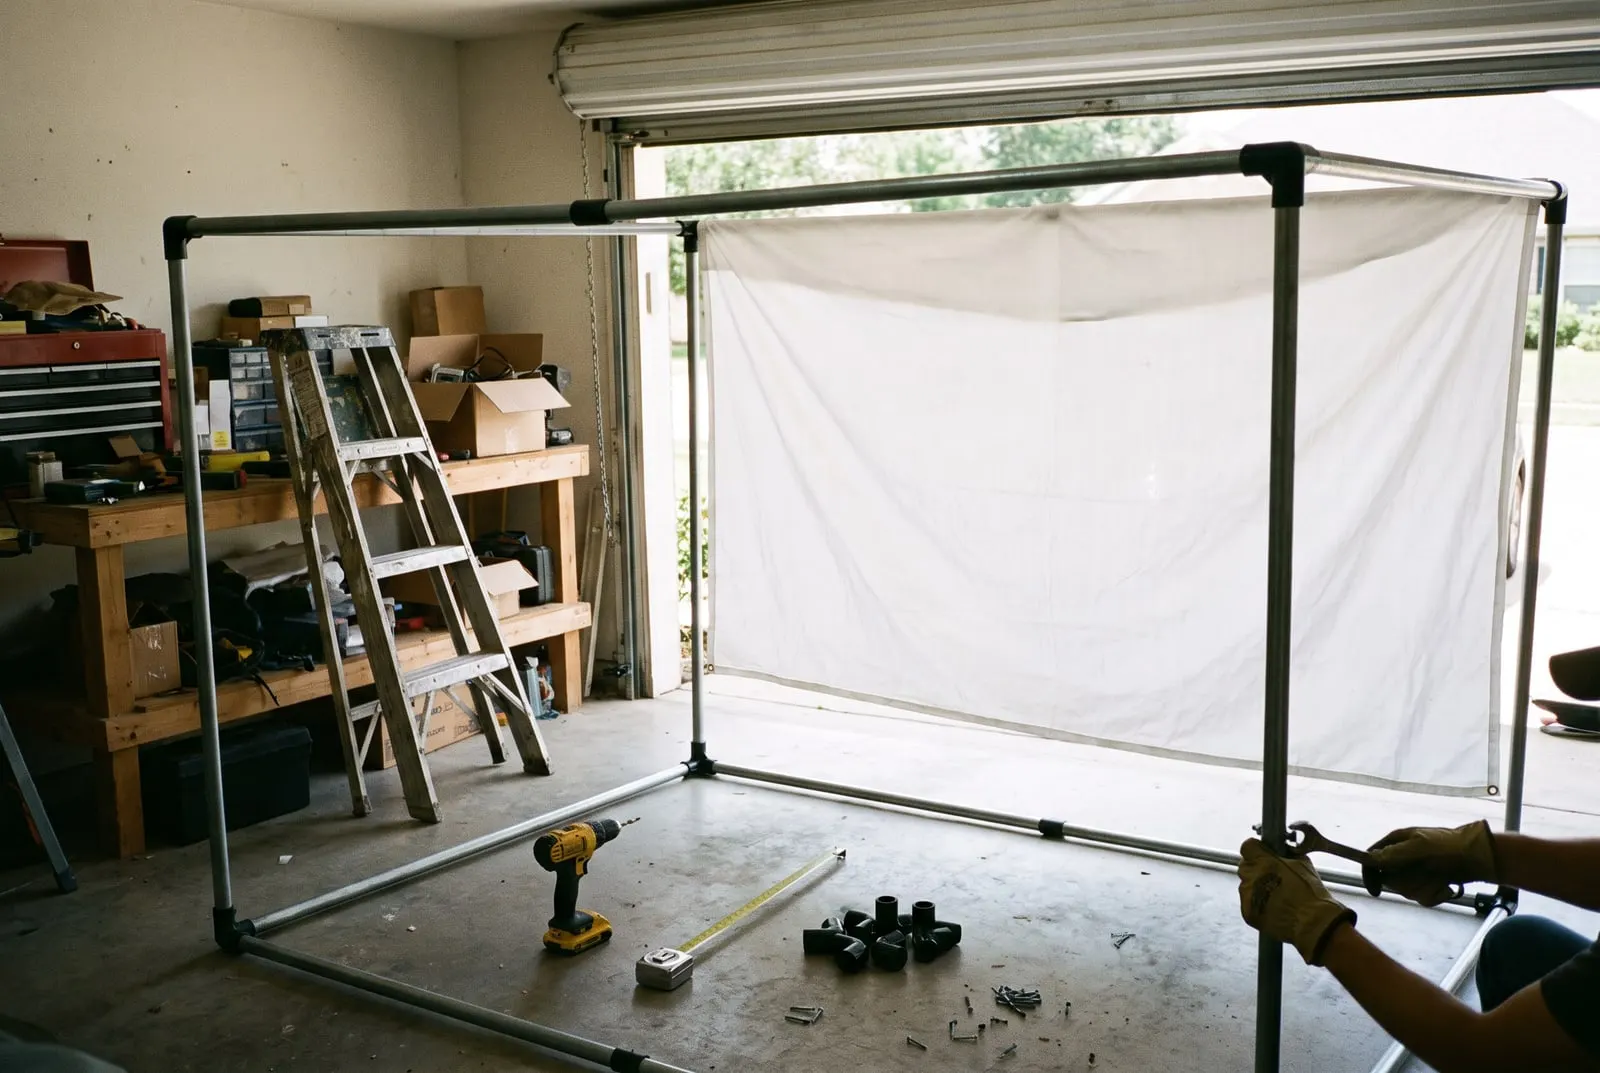
EMT conduit. This is the classic DIY route. You buy 1 in electrical conduit from a hardware store, cut it to fit the room and join it with fittings made for the job. It’s cheap and stiff enough, and it fits a 10 ft wide room where no kit will. Plan on a weekend. The corners are only as square as you make them.
A pipe-and-fittings kit. Same idea, in a box. You get pre-cut tubes and corner fittings in a few standard sizes, with no cutting. It’s faster and a little pricier than conduit, but you’re stuck with the sizes on offer.
Timber. This is 2 by 4 lumber, screwed to the studs or standing on its own base. It’s heavier and quieter, and it’s easy to add wings, a projector shelf and baffles. But it’s permanent, and a 10 ft tall frame needs fixing to something.
A retailer enclosure kit. Carl’s Place and similar sellers sell a frame, screen, side walls and ceiling baffle in one package. Standard sizes run about 8 to 10 ft tall, 10 to 16 ft wide and 3 to 5 ft deep. It costs the most and needs the least thought. Measure it against your room before you order, because a 10 ft enclosure in a 10 ft room leaves no space to walk. The enclosure guides compare the kits.
Whichever you pick, set the frame at least 1 ft off the back wall. That gives the screen room to move when the ball hits it.
Screen material
An impact screen is heavy, tightly woven polyester, pulled tight so the ball dents it and drops. It stops a 150 mph ball without ripping. It reflects enough light for the projector picture to look like a real picture. And it’s quiet enough for night sessions, because its weight and tension soak up the hit instead of slapping.
A bed sheet, moving blanket or painter’s drop cloth can’t do any of that. The picture is dim and the ball rips the fabric. A loose sheet taking a drive is also louder than the screen you were trying not to buy. Hit into a net until a screen fits the budget.
Screens come in grades that trade picture quality for toughness. You can buy them in kit sizes or by the foot, and our impact screen list walks through them. For a DIY frame, order the screen a few inches bigger than the frame on every side, with grommets (metal-ringed holes) fitted. Then you can pull it tight with bungee cord.
Side and ceiling baffles
The screen catches your straight shots. Baffles catch the rest.
Side baffles are strips of net or padded fabric, 2 to 4 ft wide, hanging from the frame on each side of the screen. Angle them in slightly, and they’ll stop pulls and pushes from finding the wall. A ceiling baffle is a 2 to 3 ft strip hanging from the top of the frame. It catches the skied drive and the ball that bounces up off the screen.
On a DIY frame, a strip of hitting net on each side with a bungee at each corner is enough. Kits come with them. No room for side baffles? Hang a net flat on the wall nearest your usual miss.
Mat and turf
The mat takes every single shot. Its base has to be thick enough to sit flat on a hard floor. It also has to soak up a fat shot instead of sending the jolt up your wrists. And its top has to hold a tee. Thin mats fail at both jobs and get replaced within a year, which is why mats run from $150 to $900. The hitting mat list sorts them by base thickness and feel.
Place the mat so the ball sits 8 to 10 ft from the screen, centered on the screen’s width. A radar needs its 7 to 8 ft behind the ball. A camera unit goes beside the mat, so leave 2 ft of clear floor on whichever side the maker says.
Turf is optional and goes in last. It’s a roll of landing turf around the mat, so the floor looks like one surface and balls roll back to you. A single garage bay takes about 200 sq ft, which is why turf runs $0 to $2,000. On concrete, foam tiles under the turf make the room warmer and quieter.
Projector mount: ceiling or floor
For most rooms, the answer is a short-throw projector on a ceiling mount. A short-throw projector makes a big picture from only a few feet away. Hang it flush to the ceiling on the shortest bracket you can buy. It should sit about 6 to 9 ft from a 10 ft wide screen, and 2 to 4 ft in front of the ball.
That distance is a rough guide. The exact one is the throw ratio (how far back a projector sits for a given picture width) times the image width. In that spot, the lens is out of your swing and you’re out of the beam, so there’s no shadow on the screen.
A floor mount puts an ultra-short-throw projector in a padded box at the base of the screen, pointing up. There’s no ceiling bracket, no cable across the ceiling and nothing in your swing, which helps in a low room. The catch is that the box sits in the ball flight, so low shots hit it. It works, but it’s the second choice.
Before you drill, hang a string from the ceiling where the projector will go and swing slowly. Then have someone hold a flashlight there while you stand at address, and look for your shadow on the screen. The simulator projector list gives the throw ratio for each pick.
Computer and cabling
The Garmin and Rapsodo apps run on a phone or tablet and can mirror to a TV. GSPro is simulator software for Windows, and it wants a proper graphics card. The GSPro guide lists the specs. A gaming PC for it costs $900 to $2,000.
Run the HDMI cable from the PC to the projector before the frame goes up. A ceiling run is usually 25 to 50 ft, which needs an active or optical HDMI cable, because a cheap long cable drops the signal. Put the PC on a cart behind you, with a wireless keyboard and a small monitor. That way you’re not walking to the screen between shots.
Lighting
Radars don’t care about light. Camera units want steady, even light on the ball, nothing pointed at the lens, and no direct sun through a door or window. Two LED lights, one on each side of the mat, do the job.
Keep light off the screen, because a bright room washes out the projector. You want light on the ball, dark on the screen, and a dimmer to find the balance.
What a DIY build costs
All the ranges are rough. Launch monitor prices are US retail ranges, and the rest are typical prices for each part.
What each part of a DIY simulator costs
Launch monitor
$500 to $4,000
Hitting net
$150 to $400 net build
Impact screen with frame or enclosure
$600 to $3,000
Short-throw projector
$700 to $2,000
Gaming PC
$900 to $2,000 for PC software
Hitting mat
$150 to $900
Turf around the mat
$0 to $2,000 optional
Here’s how the parts add up:
- A net build costs roughly $800 to $1,400. That’s a launch monitor at the low end (an R10 or Square Golf), a net and a mat. The display is a phone, tablet or TV you already own.
- A screen build runs roughly $3,000 to $8,000. A conduit frame with a screen sits at the bottom of the screen range, and a kit sits at the top. With a Launch Pro and a full kit, it climbs toward $14,000.
A few tips on the parts. In a screen build, the net still earns its keep as a backup or a side baffle. A standard-throw projector needs more room than you have, so stick to short throw. You only need the gaming PC for PC software such as GSPro. And with mats, pay for the base, not the top.
The cost builder adds up the parts you actually pick. If you’re shopping at the bottom of those ranges, start with the launch monitors under $1,000 list.
Mistakes to avoid
A screen too close to the wall. With 6 in behind it, the screen hits the wall on every drive. It bounces balls back at you and wears through in the middle. Twelve inches is the minimum and 18 in is better. Some makers ask for 18 in.
Projector shadow. A projector behind you or right above you puts your head on the screen at address. The lens has to be in front of the ball, or high and far enough back that the beam clears your shoulders. Check with a flashlight before drilling.
A net that’s too small. A 7 ft net in a 10 ft room catches the shots you hit well. It’s the pull that breaks the window. Buy the widest net the room takes, and hang side nets if there’s more than a foot of gap on either side.
No ceiling margin. An inch of clearance works until the day you swing a little steeper. Leave 6 to 12 in, measured on your own swing. Or plan an irons room and be happy with it.
Start with the tape
Measure your three numbers and run them through the room checker. Let the result pick radar or camera. Building in a garage? The garage guide covers the door and the cold. The room sizes page has worked plans for four common rooms, and the rest of the room guides fill in the gaps. Then buy in the order above, and the frame only goes up once.
Questions people ask
How much does it cost to build your own golf simulator?
A net build with a radar launch monitor, a net and a mat costs roughly $800 to $1,400. A screen build with a DIY frame, impact screen, short-throw projector, gaming PC and mat runs roughly $3,000 to $8,000. The launch monitor drives most of that range, and a retailer enclosure kit adds more.
Can you use a bed sheet or a blanket as a golf simulator screen?
You can hit into one, but it isn't a screen. A sheet lets most of the light through, so the picture is dim. It tears, and it does nothing to slow the ball. A real impact screen is heavy woven polyester that stops the ball, shows the picture and lasts years. It's the one part of the build not to improvise.
What is the cheapest way to build a golf simulator?
A Garmin R10 or Square Golf, a hitting net and a mat, with the app on a phone or tablet. That's simulator golf for around $800 to $1,400. The screen, projector and PC are the pricey part, and nothing in the net build goes to waste if you add them later.
Should the projector be on the ceiling or the floor?
The ceiling, for most rooms. A ceiling mount a few feet in front of the ball keeps the lens out of your swing and you out of the beam. A floor box at the base of the screen works with an ultra-short-throw projector. But the box sits in the ball flight and takes hits from low shots.
Keep reading
- How much space do you need for a golf simulator?The ceiling, depth and width a home golf simulator needs, in feet and inches, with minimum and comfortable sizes and which launch monitors fit which rooms.GuideRead it
- Golf simulator dimensions: room sizes that work, with a plan for eachFour golf simulator room plans, from a 10 by 12 ft spare room to a 15 by 20 ft dedicated bay, with where the mat, launch monitor and projector go.GuideRead it
- Garage golf simulator: how to plan a bay around the door, the car and the coldHow to fit a golf simulator in a garage: the door track, one bay or two, which way to hit, heat, light, dust, and what a budget or full build costs.GuideRead it
- The best golf impact screens and enclosuresScreen only, frame or full enclosure: how to pick a golf impact screen, how much gap it needs behind it, sizes, noise and what each type costs.Best-of listRead it
- The best launch monitors under $1,000Five launch monitors under $1,000 ranked for home use, with the room each needs, the three-year cost with fees, and what you give up at this price.Best-of listRead it