The best golf impact screens and enclosures
Screen only, frame or full enclosure: how to pick a golf impact screen, how much gap it needs behind it, sizes, noise and what each type costs.
How we make money. If you buy through a retailer link here, we may earn a commission. It costs you nothing and doesn’t change our picks. Our affiliate disclosure.
Key takeaways
- For a finished room, we'd buy the Carl's Place Pro Enclosure ($1,800 to $4,000). Frame, screen and black side and top panels come in one kit. Skip it in a bare garage.
- Leave at least 12 in between the back of the screen and the wall. 18 in is better, and some makers ask for it. That gap comes out of your room depth.
- If a car shares the garage, the HomeCourse Pro retractable ($1,200 to $2,200) rolls up. Handy with a pipe cutter? The Carl's Place DIY kit costs $400 to $1,200.
- A single-layer screen slaps loudly on every shot. If the bay sits under a bedroom or shares a wall with a neighbor, look at a triple-layer screen first.
On this page
You’ve picked a launch monitor and measured the room. Now you need something to hit into that also shows the course. That’s the impact screen: the tough fabric screen you hit into, with the picture projected onto it.
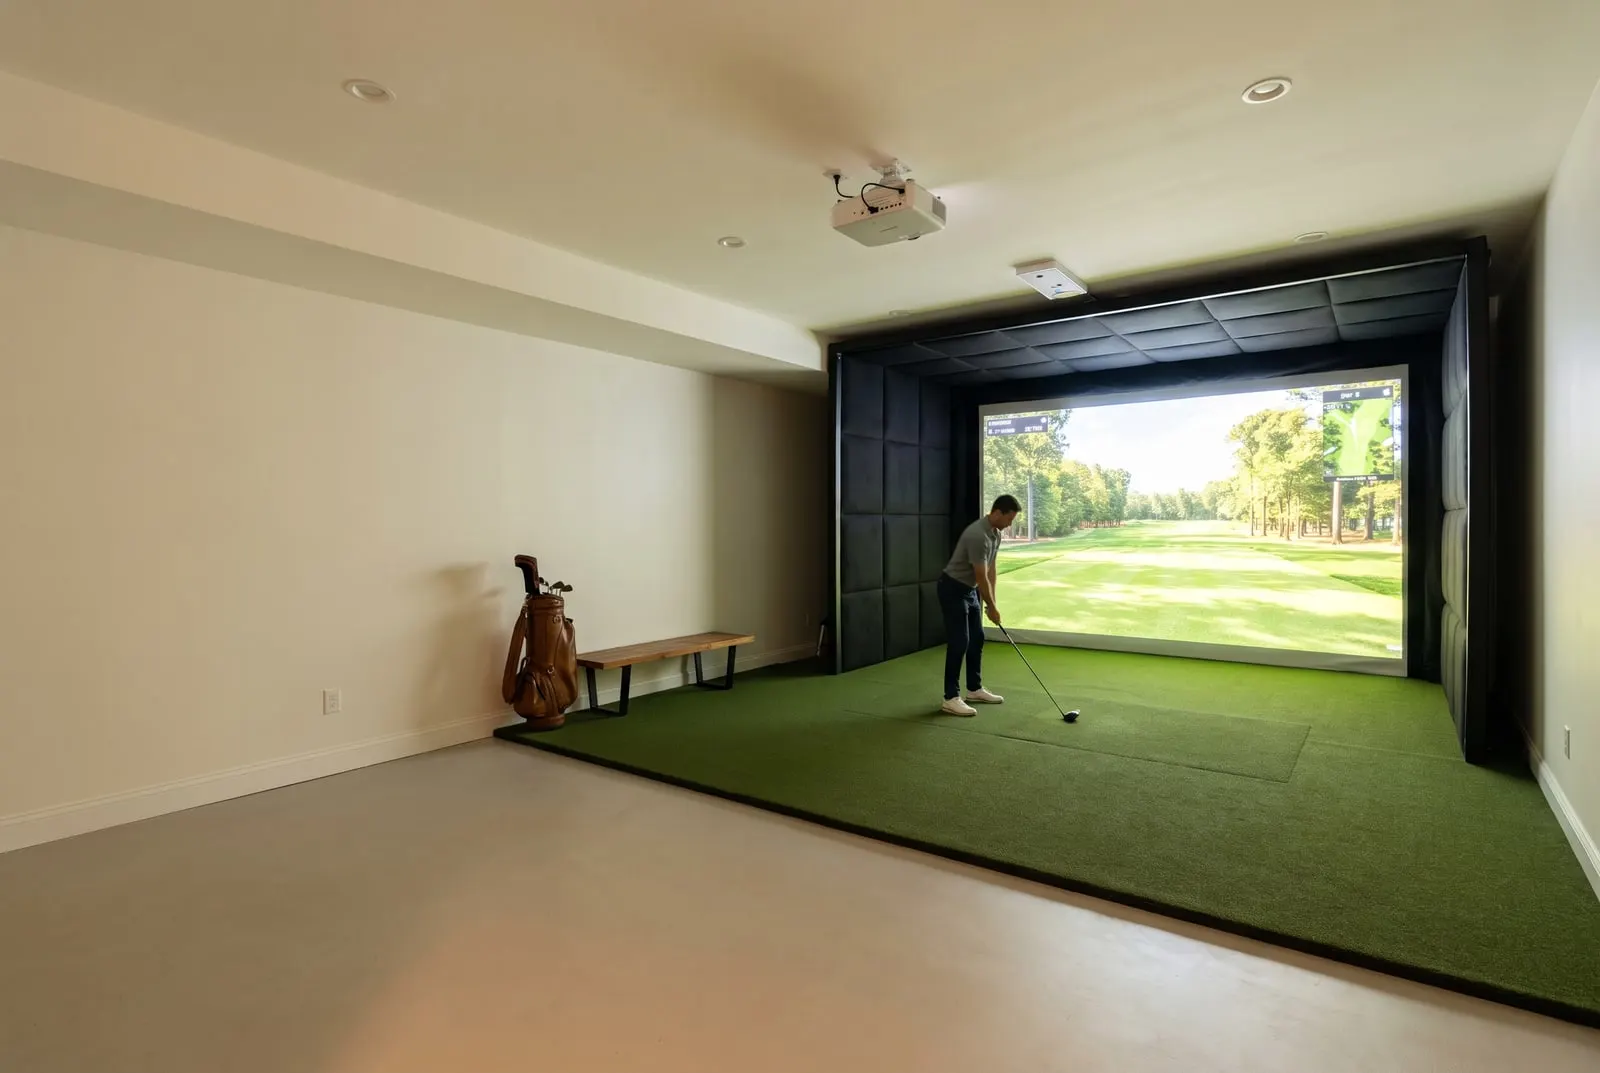
This page covers the screen, the frame it hangs in, and the full enclosure. An enclosure is the frame plus black side panels around the screen that catch stray shots. The other two big parts of the bay are the projector and the hitting mat. The enclosure guide shows how all three fit together.
Not sure a screen fits at all? Run the room checker before you spend a dollar here.
Screen only, screen with frame, or full enclosure
People mean three different things when they say “impact screen.” The prices are miles apart.
A screen only is just the fabric. You hang it from your own frame, from ceiling hooks, or from a pipe rig you build. It’s the cheapest way in. It also leaves the most on you: the tension, the edges, and stopping a shank from leaving the room.
A screen with frame adds a metal frame to hold the fabric. It’s usually a bolt-together tube kit with bungee loops around the edge. The frame pulls the screen evenly tight, which helps the picture and the bounce. The sides and ceiling are still open.
A full enclosure adds black side and top panels around the hitting bay. The side panels catch your misses. The top panel catches the skied wedge. The black fabric also soaks up stray light that would wash out the picture. Most kits sold as “golf simulator enclosures” are this.
What each setup costs
US retail bands, approximate. They move with sales and screen size.
Screen only
$200 to $800 standard to triple-layer
Screen with frame
$600 to $1,500
Retractable (garage)
$1,200 to $2,500
Full enclosure kit
$1,500 to $3,000
Premium enclosure
$3,000 to $8,000
Say you’re in a garage with a bare block wall behind the screen. A screen and some netting may do. In a finished basement with drywall on three sides, buy the enclosure.
Screen materials
Every impact screen is a heavy polyester knit. What changes is the weave, the number of layers, and how the edges are finished.
A standard screen is one layer with a texture you can see. It stops the ball and shows a 1080p picture well enough. Most budget kits ship with it. Look closely at a bright scene and you’ll spot the weave, and small menu text goes soft.
A premium tight-weave screen uses a finer knit that’s close to smooth. It holds the detail from a 4K projector, and colors look deeper. It costs about twice as much as a standard screen of the same size. If you’re pairing it with a 4K unit from the projector guide, this is where those extra pixels show up.
A triple-layer screen stacks a tight-weave front, a middle layer, and a spaced backing. The main point is less noise. A single screen stretched tight slaps on every shot, and the layers muffle it. The ball also loses more speed in the fabric, so less of it bounces back. The trade is a slightly softer picture and a higher price. If the bay is under a bedroom or shares a wall with a neighbor, start here.
Shops use their own names for these grades. Carl’s Place sells Standard, Preferred and Premium. The Indoor Golf Shop sells its SIGPRO screen in more than one grade. Rain or Shine Golf’s house-brand screens follow the same pattern.
Bounce-back and the wall clearance
Bounce-back is the ball coming back at you off the screen. Every screen does it a little. The bad ones hang too close to a wall, are stretched too tight, or hang so loose the ball hits something hard behind them.
At driver speed the fabric bulges back several inches. If it meets the wall, the ball comes back hard and the screen wears a hole at that spot. The picture suffers too, because a screen that bangs a wall ripples for a second after every shot.
The gap behind the screen
Clear space between the back of the screen and the wall or anything hard.
Too close
The screen hits the wall and the ball comes back hard
The minimum
Works, but some makers ask for more
Better
18 in or more
Under 12 in
Too close
The screen hits the wall and the ball comes back hard
12 in to 18 in
The minimum
Works, but some makers ask for more
18 in and up
Better
18 in or more
That gap comes out of your room depth, so plan for it. Say your room is 16 ft deep and the screen sits 1 ft off the back wall. That leaves 15 ft for you, the ball and the launch monitor. It’s exactly what a Garmin R10 needs, and that’s before the frame takes its own couple of inches. The golf simulator dimensions page walks through the rest of that math.
Some kits come with a foam backing for rooms that can’t spare the full gap. It costs a few hundred dollars and it helps. The full gap still works better.
Sizes and aspect ratio
Screens come in two common shapes, plus a rarer square one:
- 16:9 is the shape of a TV and of nearly every home projector. The picture fills the whole screen with no wasted light. Sizes run from about 8 ft wide by 4 ft 6 in tall up to 16 ft by 9 ft.
- 4:3 is taller for the same width. It suits a bay that’s tight on width but still needs height to catch a wedge. A 16:9 projector shows black bars on it unless you set the projector and software to 4:3.
- 1:1 is square. It gives the most height for the width, so high shots have the biggest target. It also wastes the most projector light.
Pick the projector and the screen together. Nearly every simulator projector is 16:9, so a 16:9 screen is the easy match and the sharpest picture for the money. A 4:3 or square screen fills a tall, narrow bay better. Set the projector and software to that shape or live with some black bars, and buy a projector bright enough to fill it.
A screen that’s too small isn’t just ugly. It’s a safety problem. Size it to the full width of the bay, with at least 1 ft of side panel on each side.
Side panels, top panels and the shots that miss
Heel and toe strikes fly sideways. A skied driver goes up. The screen catches none of them.
Side panels and a top panel come with every full enclosure. They’re black fabric stretched over the same frame, and they catch the misses and soak up stray light. Some kits add a padded strip along the top edge of the screen. It stops a high shot from hitting the frame and flying back at head height.
Buying a screen only? You still need something on the sides. Netting or a second sheet of cheap screen fabric will do. A bare wall with a window won’t.
Then check the ceiling. The frame on most kits sits a few inches above the screen, so it needs its own headroom. You need 9 ft for a driver, and under 8 ft 6 in is irons only. The how much space do you need page has the full ceiling math.
How the types compare
Price isn’t the only difference. Here’s how noise, picture and the build job stack up.
| Type | Noise | Picture | Install job |
|---|---|---|---|
| Screen only, standard | Loud | Fine for 1080p | Hard: you build the frame |
| Screen only, premium or triple-layer | Quieter (triple) | Good for 4K | Hard: you build the frame |
| Screen with frame | Loud to moderate | Depends on the screen grade | A weekend for two people |
| Full enclosure kit | Moderate | Good, black sides help | A weekend for two people |
| Premium enclosure | The quietest options here | Best, tight-weave screen standard | Easy to medium, some offer install |
| Retractable (garage) | Loud to moderate | Fine for 1080p | Easy: ceiling mount |
Shipping a full enclosure isn’t cheap, because the frame parts are long and heavy. Add everything to the cost builder with the rest of the build before you decide.
The picks
| Pick | Kit | What you get | Price (approximate) |
|---|---|---|---|
| Best overall | Carl’s Place Pro Enclosure | Frame, screen, side and top panels | $1,800 to $4,000 |
| Best DIY | Carl’s Place DIY Enclosure Kit | Screen and panels, you add pipe | $400 to $1,200 plus $100 to $300 of pipe |
| Best for garages | HomeCourse Pro retractable | Screen and side nets that roll up | $1,200 to $2,200 |
| Best premium | SIGPRO enclosure, premium screen | Heavy frame, tight-weave screen | $3,000 to $7,000 |
Best overall enclosure kit: Carl’s Place Pro Enclosure
Carl’s Place has sold impact screens for years, and the Pro Enclosure is its all-in-one kit. You get a bolt-together metal frame, the screen grade you pick, black side and top panels, and the fittings to hang it all. It comes in a range of widths and depths, and the gap behind the screen is built into the frame depth.
Who’s it for? You’ve got a finished room, you want a clean black bay and a sharp picture, and you want it all in one box. Pair it with the Preferred or Premium screen if your projector is 4K.
Skip it if you’re in a bare garage and don’t care how it looks. Skip it too if you can build a pipe frame yourself for half the money.
Price: $1,800 to $4,000, depending on size and screen grade (approximate).
The two close rivals are the SIGPRO enclosure from The Indoor Golf Shop and the SwingBay kit from Rain or Shine Golf. Both ship complete with a house-brand screen in a few standard widths, at about the same price. Pick on the width you need and the screen grade on offer that month.
Best DIY screen: Carl’s Place DIY Enclosure Kit
The DIY kit is the Carl’s Place screen and black panels, with grommets or a pipe pocket, but no metal. You buy EMT conduit or steel pipe at the hardware store, cut it to the plan, and hang the kit. Carl’s Place publishes frame plans for its sizes.
It suits you if you’ve got a garage or basement and you’re happy with a pipe cutter. You get the same screen as the full kit for much less. It’s also the way to go in an odd-shaped room, because you build the frame to fit.
Skip it if you want a finished-looking frame. Skip it if nobody can help you lift a 10 ft pipe over your head, or if you’d rather pay than spend the weekend. The DIY golf simulator page covers the rest of a self-build.
Price: $400 to $1,200 for the screen and panels, plus $100 to $300 in pipe and fittings (approximate).
Best for garages: HomeCourse Pro retractable screen
The HomeCourse Pro works differently. The screen and side nets live in a case on the ceiling. They drop down for a session and roll back up when you need to park the car.
It suits a two-car garage where the bay has to vanish on weekdays. It also suits a family room where a big black box isn’t allowed, and renters, since it goes up with a handful of ceiling anchors.
Skip it if the bay can stay up. A fixed enclosure gives you a tighter screen, a better picture, and side panels that catch more. The HomeCourse hangs rather than stretches, so the picture is a little less flat. The bounce-back is softer but harder to predict. The garage golf simulator page covers the other garage trade-offs.
Price: $1,200 to $2,200 (approximate).
Best premium: SIGPRO enclosure with the SIGPRO premium screen (The Indoor Golf Shop)
The Indoor Golf Shop’s SIGPRO enclosures come from about 8 ft to 12 ft wide, with deeper frames for rooms that have the space. The top grade ships with its tight-weave premium screen. The frame is heavy steel, the side panels run full height, and the finished bay looks the closest to a commercial one you can buy as a kit. Padded top strips and a sound-cutting screen backing are extras.
It’s for a dedicated room with a 4K laser projector and a budget that already covers a camera launch monitor like the Bushnell Launch Pro. At this level, the screen stops being the weak spot in the picture.
Skip it if the room is a garage with a concrete floor and a door that lets in sun. You’d be paying for picture quality the room can’t show. Carl’s Place sells the same tier with its Premium screen. It mostly comes down to which one makes your exact width and depth.
Price: $3,000 to $7,000, depending on width, depth and extras (approximate).
Which one to buy
Got a finished room and want it done in a weekend? Buy a full enclosure kit from Carl’s Place, The Indoor Golf Shop or Rain or Shine Golf. Pick the width that leaves at least 1 ft of side panel on each side, and match the screen grade to your projector.
Got a garage and a car? The HomeCourse Pro is the only pick here that gets out of the way. Got time and a pipe cutter? The DIY kit gets you the same screen for a third of the price.
Before you order, measure the inside opening twice and add the foot behind the screen. Then check it all in the room checker. Next, sort the projector and the mat, because you’ll look at all three on every shot.
Questions people ask
How far should a golf impact screen be from the wall?
Leave at least 12 in between the back of the screen and the wall, and 18 in is better. The screen bulges back when a driver hits it. If it touches the wall, the ball shoots back at you and the screen wears a hole. If your screen maker asks for more, use their number.
Can you use a regular projector screen for golf?
No. A home theater screen is thin vinyl or fabric, and the first full shot tears it. A golf impact screen is a heavy polyester knit built to stop a ball at 150 mph or more. The tighter weaves are still smooth enough for a sharp picture.
How loud is a golf impact screen?
A single-layer screen stretched tight makes a sharp slap on every shot, loud enough to hear through a floor. A triple-layer screen with a spaced backing is a lot quieter, so buy that one for a bay under a bedroom. Nothing makes it silent.
What size impact screen do I need?
Match the screen to the projector first, then to the room. Nearly every simulator projector is 16:9, so a 16:9 screen uses the whole picture. A 4:3 or square screen gives a narrow bay more height but shows black bars unless you set the projector and software to that shape. Measure the enclosure's inside opening, not the wall.
Keep reading
- The best projectors for a golf simulatorHow to pick a golf simulator projector: why short-throw matters, throw ratio made simple, how bright for a garage, 1080p vs 4K, and what each band costs.Best-of listRead it
- The best golf hitting mats for a home simulatorWhy cheap mats hurt, fiber vs nylon turf, how thick, what size, what camera launch monitors need from a mat, and what each price band gets you.Best-of listRead it
- Golf simulator dimensions: room sizes that work, with a plan for eachFour golf simulator room plans, from a 10 by 12 ft spare room to a 15 by 20 ft dedicated bay, with where the mat, launch monitor and projector go.GuideRead it
- Garage golf simulator: how to plan a bay around the door, the car and the coldHow to fit a golf simulator in a garage: the door track, one bay or two, which way to hit, heat, light, dust, and what a budget or full build costs.GuideRead it